Updated 07 July 2014
A couple of items to note before we get rolling:
Parts list for the Original Darell Method:
Tool List:
I finally sucked up enough courage to remove both of the vent louvers (quarter vents) to access the filter screen. I started by spending HOURS and spilling quite a bit of blood in trying to access these clips from inside the cargo area. Was so frustrating that I almost gave up! Days later, I went back at it, and this was the result. The good news is that I removed the louvers without breaking the expensive parts. It is NOT easy to remove these vents, and you will swear that the plastic, painted exterior piece will break with every prying attempt. I finally removed them in the factory-approved fashion of prying from the outside (I used a Snap-on pry bar with a taped tip). You have to pry harder than you think you should. Suck it up - it needs to be done.
While my screens were nowhere near what I would call "clogged" - they were filthy. Washing them in soap and water made them look and feel shiny and new. The screen is a plastic mesh that looks similar to what you find on a window screen. Why clean these screens? Every time the battery fans run (almost always when the vehicle is running in "warm" temps and when the vehicle is charging), ambient air is filtered by this screen before entering the battery compartment. There is no easy access to this screen, but if the screen becomes clogged, even partially, the batteries can overheat. A HUGE volume of air passes through these screens. I almost lost my cleaning rag down there while the vehicle was charging. Keep your small pets at a safe distance!
** Latest vent update is that I have greatly increased the screen surface area by building my own screens into the black metal frame. See the new Vent Screens here.
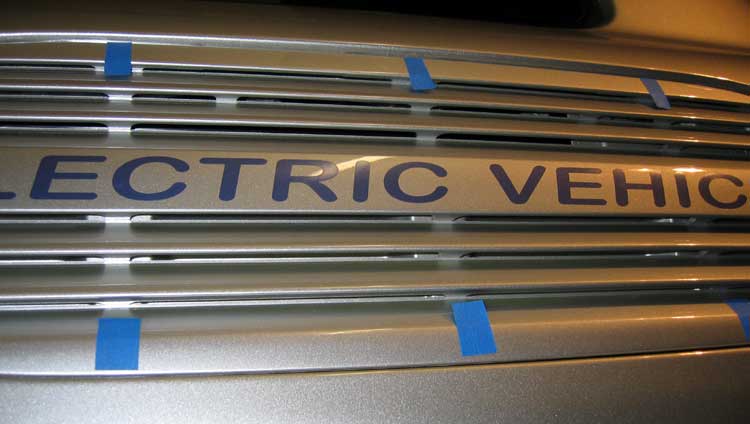
The first step in vent removal is to locate the
clip positions. In this first picture, I marked the positions with blue tape
so you can see where the clips are hiding. Look up the louvers, you can
see the "web" of plastic that supports the clips. The clips are directly
in line with these three webs, both top and bottom. There are two additional
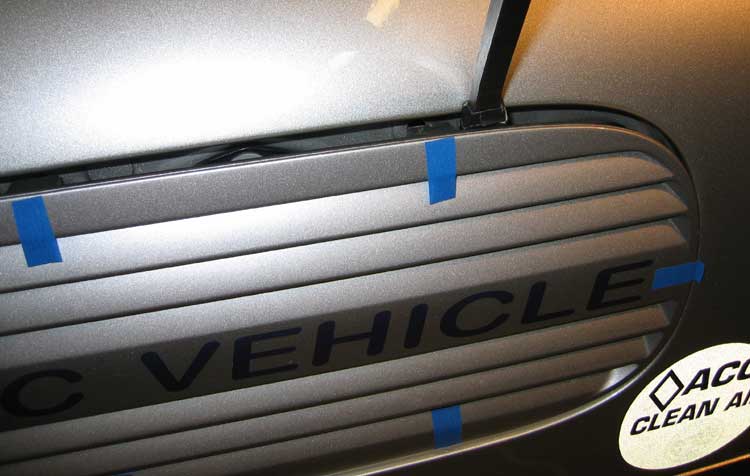
clips, one on each end in the middle of the thick part with the lettering on
it (see the following picture for the tape marking of these clips).

Once you have selected your prying tool, wrap the
tip in some tape to protect the paint. I found that a piece of heat-shrink tubing
works even better than tape. Here you can see my pry bar with black tape prying
in the correct position. You want to insert the prying tool just to one
side of each clip position. Do NOT pry at the web! Pry right next to it. Brace
yourself for the terrible sound of the breaking clips and begin to firmly pry
against the rolled edge of the vent well. The louver piece will bend, and you'll
swear it will break. I haven't yet heard of one breaking though - and this IS
the Toyota-presecribed removal method!
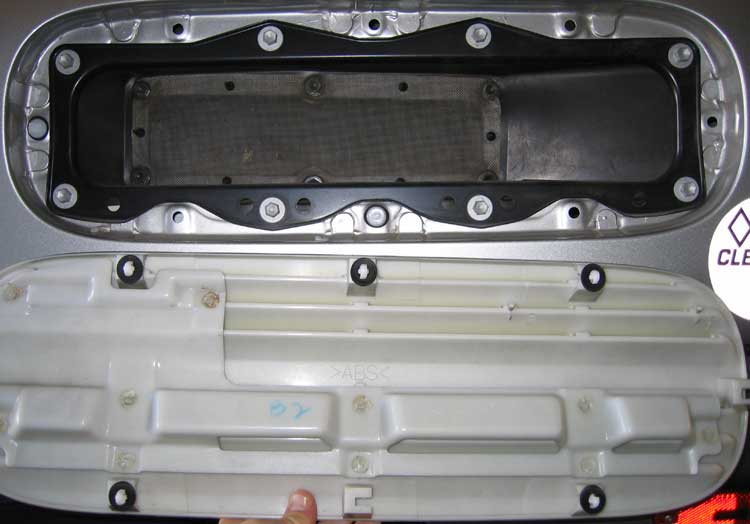
When you finally get the louvers off, here is your
reward. It is now quite obvious how the screen comes out. There are six bolts
(everything is 10mm) and six rubber nubbins that hold the screen in place. You
will find it easier to first remove the eight bolts that hold the black metal
frame (and then remove the frame) to allows easier access to the bolts that
hold the screen in - and you have to take that frame off to finish the job anyway.
Might as well do it now. The back of the louver piece is shown below the vent
hole here. Some clips are whole, some are broken and some stayed behind in the
holes of the car. The broken clips come out of the louver easily by sliding
sideways. They can be tough to get out of the holes in the car - just use pliers
and swear a little. They'll come out eventually.
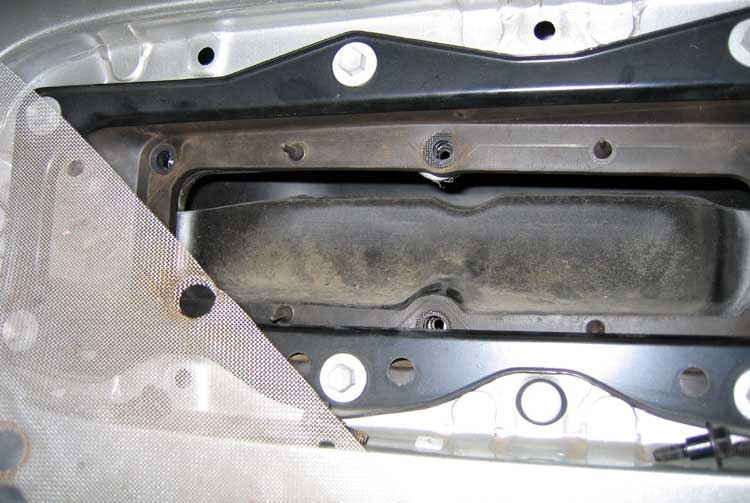
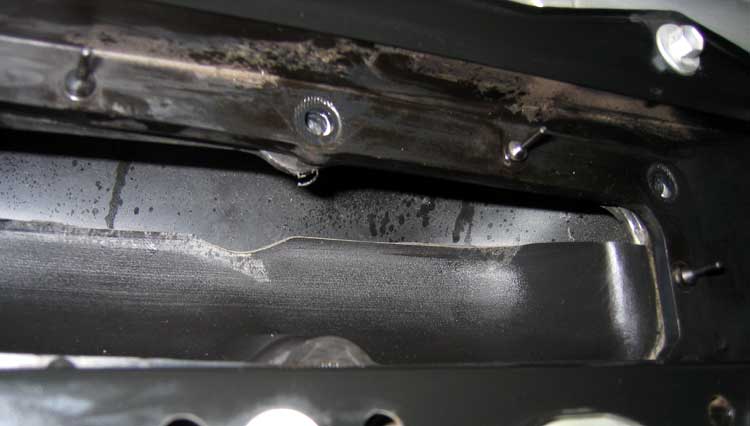
Removal of the screen gives a good view of the dusty
intake. The battery cooling air is sucked up that deflector, and then down into
the battery compartment. That deflector is only there to keep any water out,
I believe. A side benefit is that it is harder to drop your screws down in there
during removal and assembly.
A picture looking up the deflector. I'm not proud
- I was only half done cleaning when I took this.
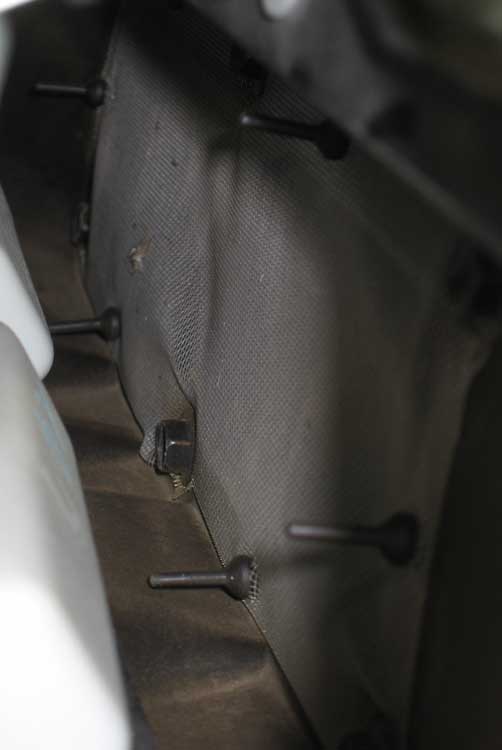
An oblique view of the screen before removal shows
how much dust (and a bug?) is trapped in it. This view also shows how the nubbins
hold the screen in place.
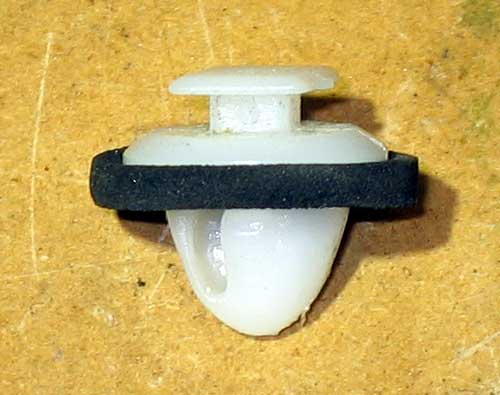
Close-up of the factory clip. I broke about half
of them during louver removal. The Toyota number for this part is: 76817-23010,
price is about $2/ea. 16 are needed for both vents if you want to return the
vehicle to stock form (I have a bunch of these if you want 'em - I bought them
with the plan of modifying them for this project, but since decided that magnets
would be better).
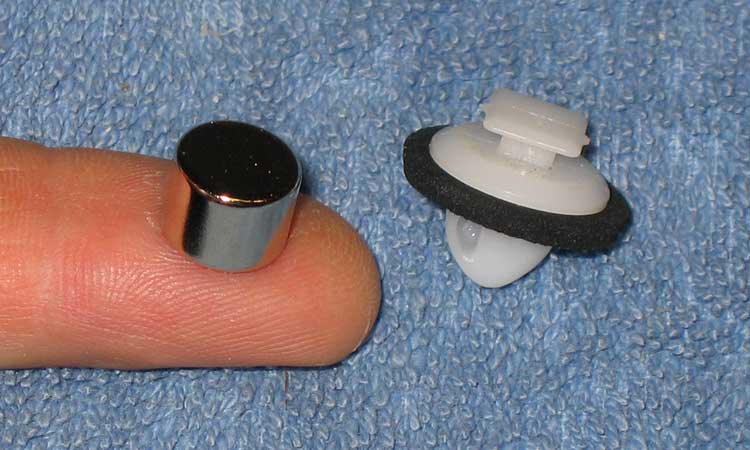
OK, now the fun begins. On the right is the
factory clip (one of the few that survived!) and on the left is the rare-earth
magnet that will replace it. After much trial and error, I found this
to be the ideal size. It is 0.4" in diameter, and 0.3" tall.
Any larger in diameter and it will not fit behind all the vent tabs (there are
two different sizes of tabs). The length of the rod (vs using a flat disk) increases
the attraction when a gap is used as in this case. My attractive finger is used
for scale.
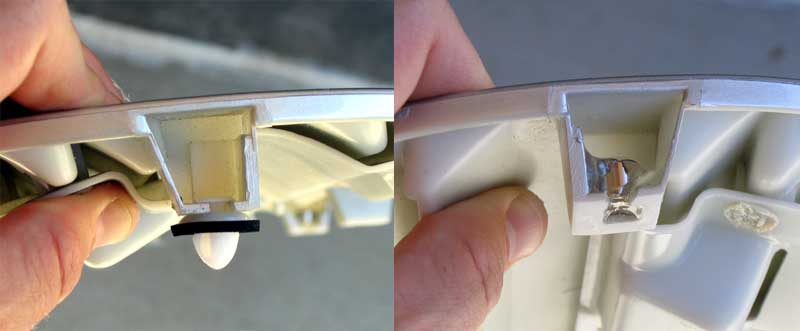
Here is where the factory clip used to reside, and
then a similar "after" picture with a magnet glued into place. The
magnet will now sandwich the plastic flange, so nothing is trying to pull the
magnet off the vent - the magnet attraction simply holds the vent tighter. The
adhesive is only to keep the magnets from falling out when the vent is removed
- the magnets hold themselves in place when the louver is attached to the vehicle.
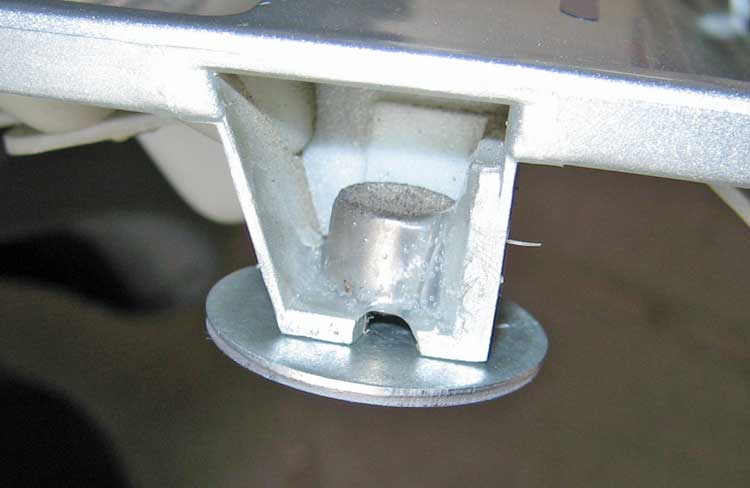
To ensure that the magnets end up in the right spot
when the glue sets up, either place a piece of steel (large washers work well)
on the flat surface that will mate with the vehicle (this will pull the magnet
up tight to the back of that surface), or set the whole assembly shiny side
up so that gravity puts the magnets where they belong. When using the gravity
technique, you'll need to watch that the magnets don't walk away as they settle
in... and you'll need to watch the drips that could interfere with the mating
surfaces. Below is a picture of my steel "attraction disks" in place
while the glue sets. To be safe, you can first wipe your disks with petroleum
(yeah, petroleum... I know...) jelly or put wax paper between the mating surface
and the disk - then you don't risk gluing the disks on permanently.
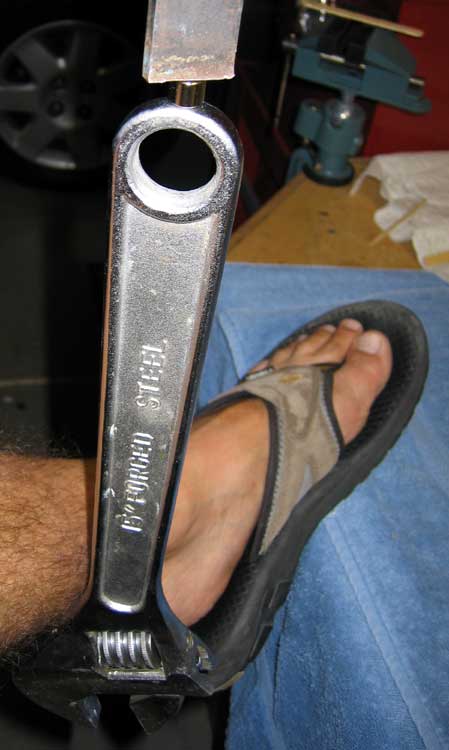
For those who worry that these magnets are not up
to the challenge: Here is one holding a 15" wrench (weight approximately
3 pounds) by itself. We're using seven of these to hold a vent on that weighs
a fraction of this wrench. Of course there will be the gap of the thickness
of the sandwiched plastic to lower the attractive force. Attractive foot
included for scale.
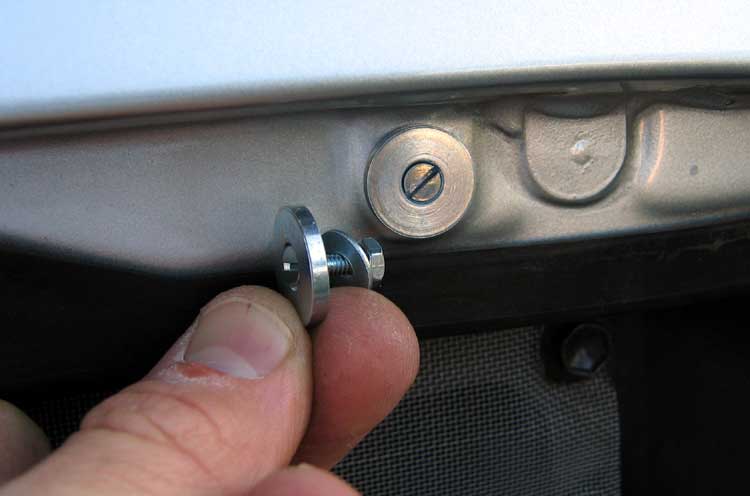
Picture of the fat washer/4-40 screw/retaining washer/nut
assembly. The washers are countersunk for a 4-40 screw, and a washer and nut
go on the far side of the flange to hold it all in place (with a drop of Locktite).
These steel washers space the louvers out from the vent indentation. Without
this extra space, the louvers end up being slightly recessed, and not flush
with the surrounding exterior sheet metal. The louvers will stick in the hole
just fine without the washers if you don't mind them not being totally flush
with the bodywork. To get to the back of these screws (to hold the small washer
and nut) first remove the entire rubber gasket from the filter hole. This is
something I learned AFTER doing mine the first time (and so I have no pictures!).
Pull the whole black gasket out, and you can easily shove it back in later.
I'm here to tell you that it is possible to perform this whole operation with
the rubber gasket in place - but it is NOT fun!
View of where the fat washers are to be mounted
with the 4-40 screws.
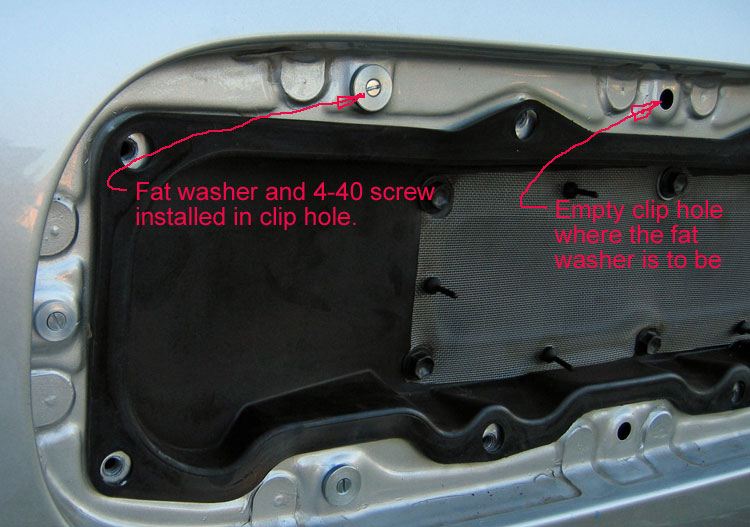
All holes with fat washers attached (except for
the middle holes - the top was for a locating pin that I ended up not using,
and the bottom is for the tether).
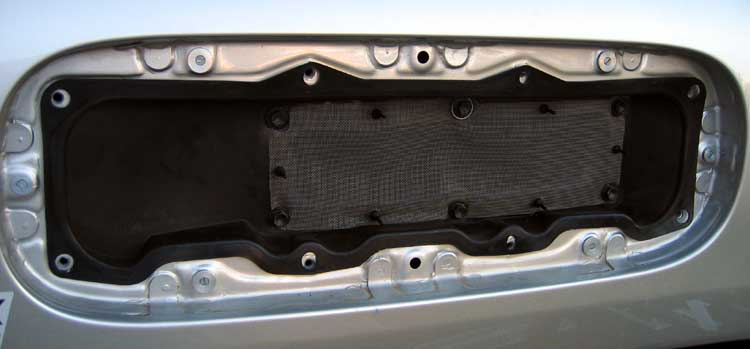
Complete and ready to button up. I first used parachute
cord to tether the louvers to the car (since replaced with wire for easier hole
insertion - seen here).
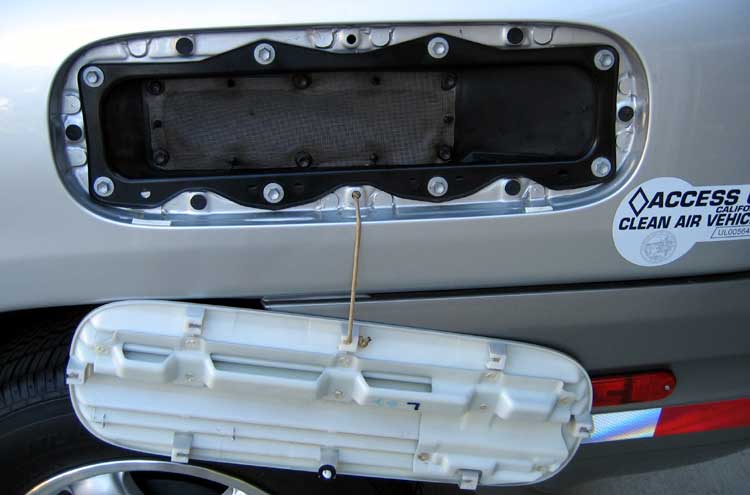
Even if everything else fails, and the louvers fall out, I still won't lose
them on the road. This view shows all the fat washers covered with a very thin,
high-friction tape to prevent the louvers from moving around in the hole (I
have since removed this tape to increase the magnetic attraction). This shot
also still shows the top middle hole open for the locating clip that I ended
up not using - though you can see the clip I was going to use on the back of
the dangling louver. That top middle position now has a washer on it, and there
is a mating magnet in the louver. In my final iteration, I use washers and magnets
at every position except the middle bottom hole where the tether is shown.
An oblique view to show the flush fit after magnet
installation. It takes about three seconds to remove and replace the louvers
now. And they will NOT be falling off by themselves. The fit ended up being
better than the fit from the factory, actually.
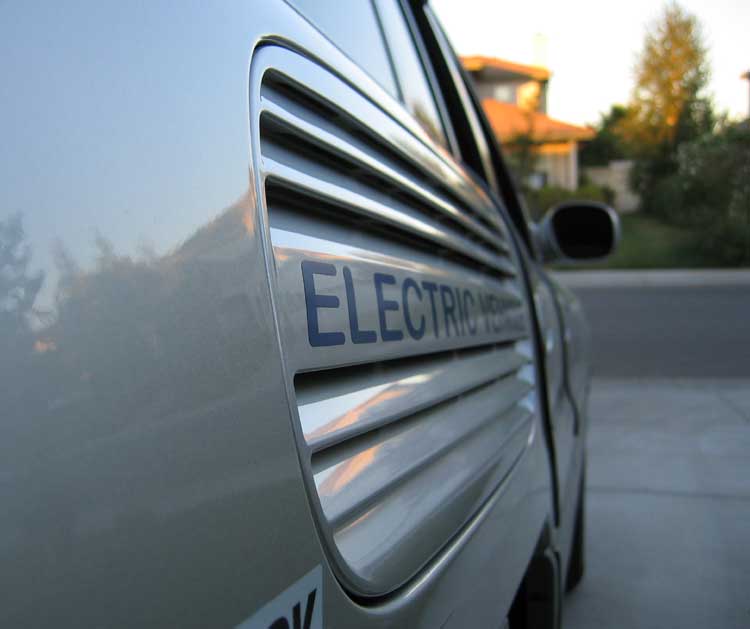
All Done at sunset. I look bald here, don't I?
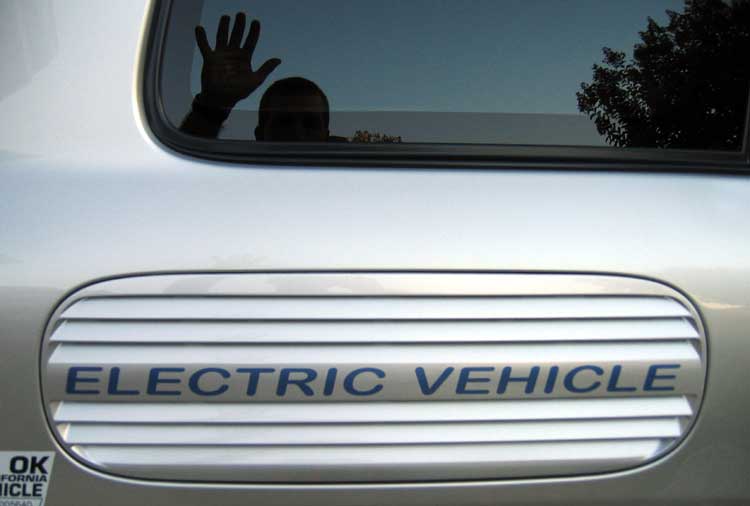
NOW you can start drinking beer and patting yourself on the back. Yours in better battery cooling - Darell.
 |
Click for |