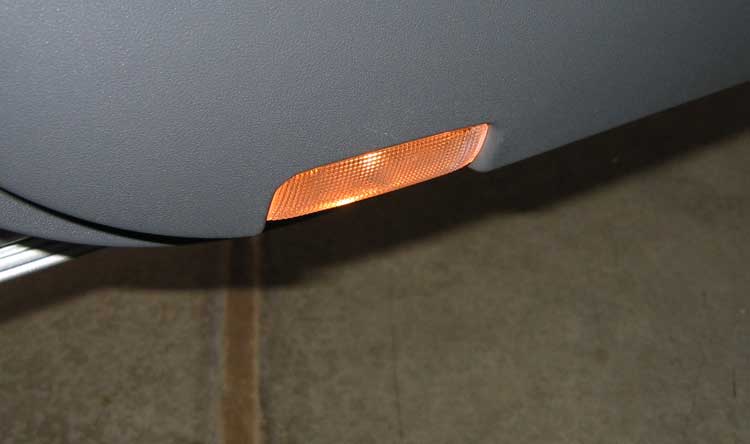
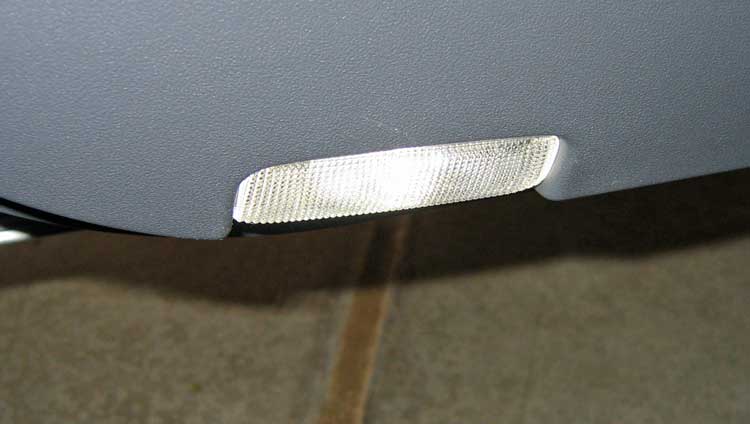
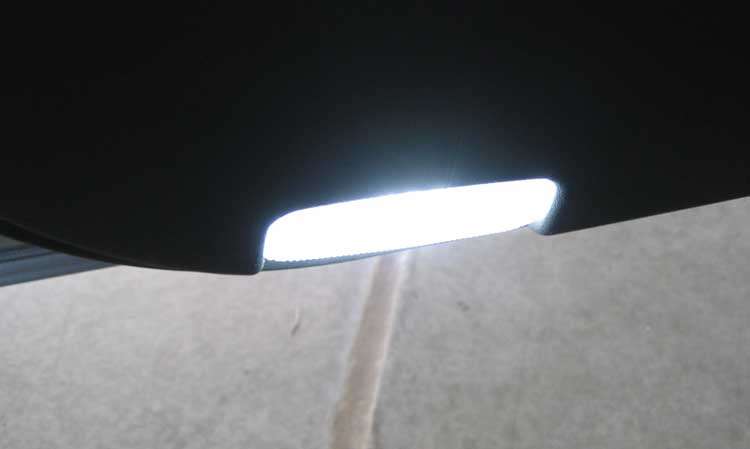
What are those little lights for anyway? Seeing a puddle before you step out of the car? Warning drivers behind you that the door is open? Well, they don't seem bright enough for any of that, so it is time for LEDs! I haven't yet figured out a way to make a "drop-in" module for these, so I've soldered the circuit into place. This conversion made a HUGE difference. In factory form, you barely noticed that there is a light at the bottom of the door. It seems just bright enough to see that the light is lit. Now it actually illuminates the area around the side of the car.... a lot. Factory bulb draws 5W, this conversion draws just over 1W.
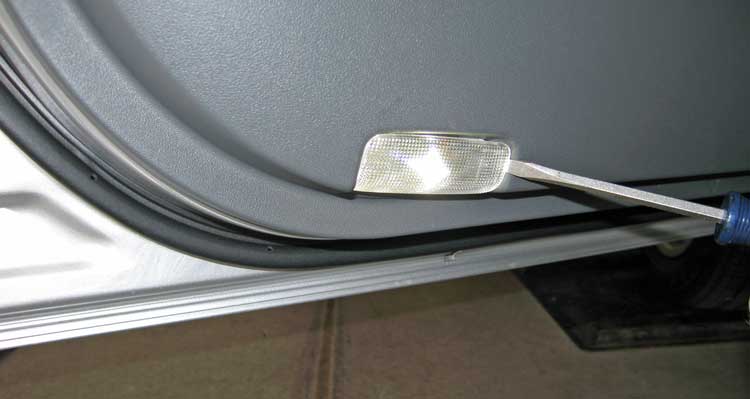
To remove the fixture from the doors, you must pry on the proper
end of the fixture. For the (USA) driver's door, pry on the side of the fixture
that is nearest the door *hinge* as shown here. For the passenger door, pry
on the end of the fixture that is nearest the door latch (opposite of what
is shown here!). Bottom line: if you're looking at the fixture, always pry
on the right-hand side regardless of which door. Unclip the white wire connector,
remove the clear plastic protector from the rear of the fixture, and pull
the factory bulb out.
After the fixture is removed, you'll see a clear plastic cover
clipped to the back. We need to remove the cover and pop the bulb out and
solder the new circuit into place. Just press as shown here with the tip of
your index finger, and pull back on the cover (this fixture shown with LED
circuit in place, of course). This rear cover does not need to be replaced,
but if you take some care in circuit placement, the cover can be reused.
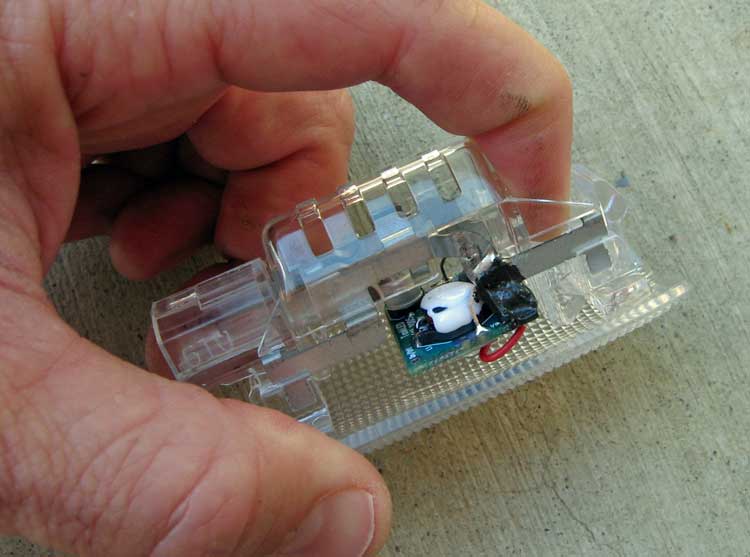
Now you have the cover off and the bulb out. Next step is to
attach the lead wires for the circuit to the power bars of the fixture. Here
is a rough idea of placement and angle. These can be bent into final shape
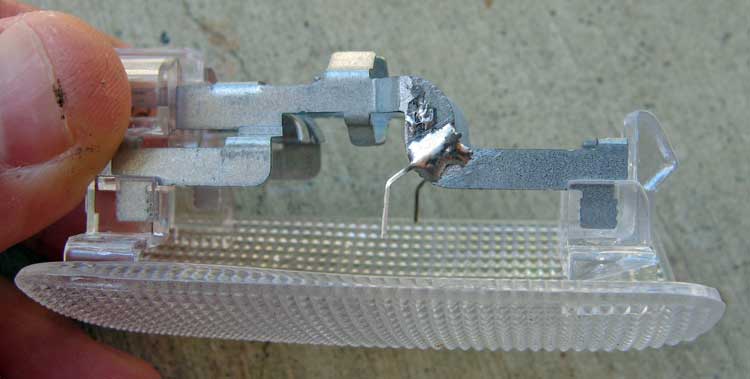
after the circuit is in place. To solder the leads to the power bars, first
file/grind a shiny area in the bars where you will solder. Use flux, and don't
over-heat the bars (which are anchored to the plastic of the diffuser!) Please
disregard the ugly solder up higher - that was the first attempt on my prototype.
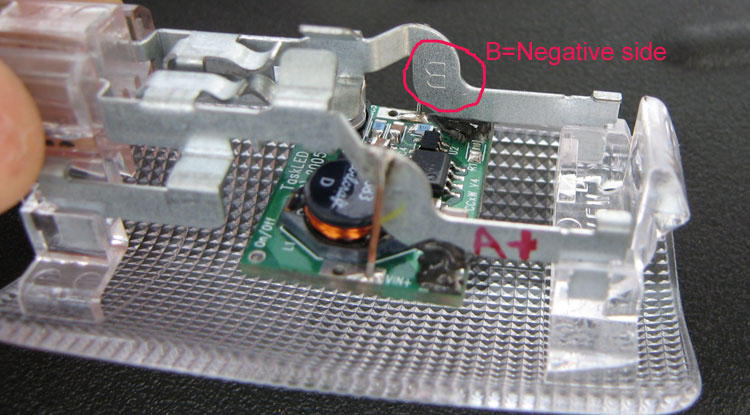
Next you want to shove the circuit board into place in the orientation
shown below (this is again a photo of the prototype, but the best one I have
to show polarity) and solder the leads to the correct power input pads on
the circuit board. The two metal (powered) bars of the fixture have a letter
stamped on the inside of them. The one with "A" stamped into it
is the positive side. Circled in red here is the negative B side. You won't
hurt anything if you get it in backwards (the circuit is reverse-polarity
protected) - but you also won't get any light! You want the board to hang
down from the bars (nearer to the diffuser) as far as can easily be accomplished.
this is to keep the board out of the way of the hole in which this fixture
sits.
Now the circuit is soldered in place, and hanging low on the
angled leads, it is time to add a bit of stabilizing/insulating goo. I used
silicone which works perfectly and is easy to remove later if needed. We're
trying to prevent the circuit from moving around, and possibly shorting on
the power bars. I'm spanning a pretty big gap with the goo here.
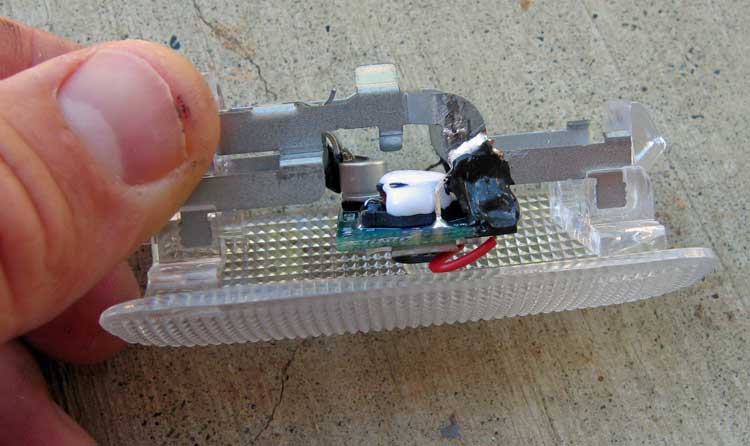
The other side where there are two good spots for goo:
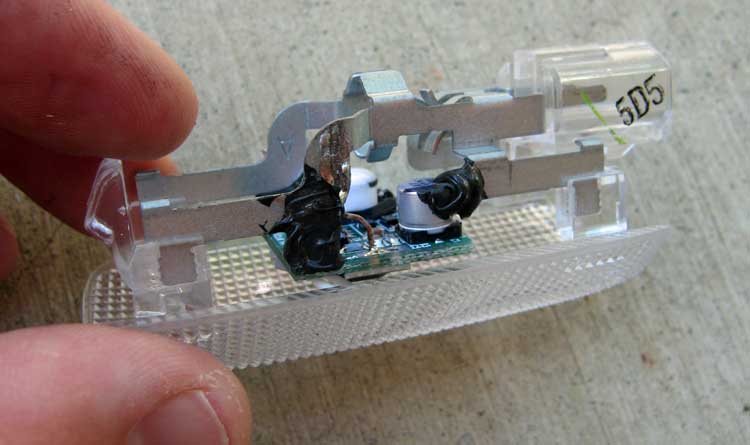
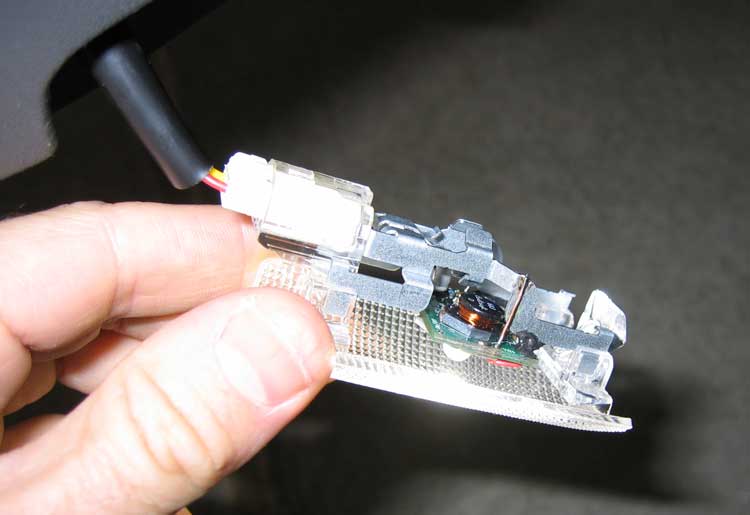
After the goo, you can choose to snap the back cover on... or
leave it off. Now clip the fixture to the power harness from the door and
make sure you get light (yes, we're back to the proto picture again). When
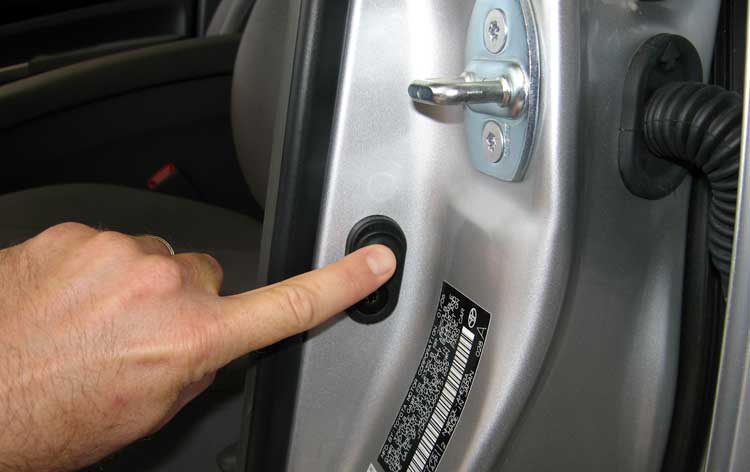
inserting the fixture back into position, hold the rubber button below the
door strike to turn the power off to the fixture (just to avoid the possibility
of shorting during insertion - it has happened!) After fixture insertion,
remove your finger from the rubber button, and you should have your bright
LED light all done.
Here's the door button you should hold with one hand while inserting
the unpowered fixture with the other.
This is what the factory bulb looks like in place. It isn't
QUITE that orange in real life, but it sure isn't white! Ick.
