Never attempt this activity. You will destroy your car and surely bring death and dismemberment upon yourself and your loved ones. I offer the following information only for academic purposes, and am compelled to warn you that even viewing it will cause - at a minimum - hives and severe dehydration. You assume all risk after reading beyond this line.
If your Rav4EV seems to start charging, and then turns off after 34-40 seconds - and it does this no matter what charger you use - then it is likely that your input capacitor has given up the ghost. The TAL charger will show the ERR light (red LED), and the Gen II or Gen 2+ will show the error "E1" on the charger's display. You can determine for sure if the input capacitor has failed by following these steps:
Toyota used to replace the entire rectifier assembly to fix this - a $5,000 part, plus labor. There has never been a separate part number for the capacitor, and thus no way to order just the replacement part. Then Michael Schwabe (mschwabe1950 _@_ gmail _._ com) had a new, more robust unit built to his specs. It can accept both higher voltage and higher current. The new one should last well beyond the life of the car, while the original was barely adequate for the job. Last I checked, Michael charged $125 + $12 shipping for his new caps. In early 2009, it appears that Toyota has started to offer replacement of the capacitor - for over $700 parts + labor.
Here is a video that shows the general procedure (Doug Korthof). CLICK
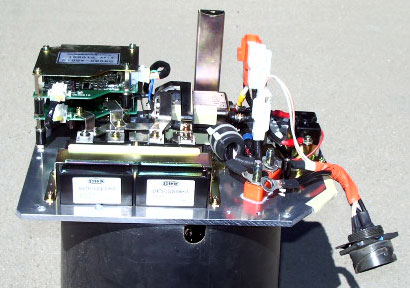
Here is the 2002 rectifier assembly out of the suitcase. The input cap that fails is the square black unit on the left as you are facing the suitcase from the front of the car. The other black capacitor is a filter for after the RF gets rectified. It seems to be a more appropriate part and there are no reported failures of that unit.
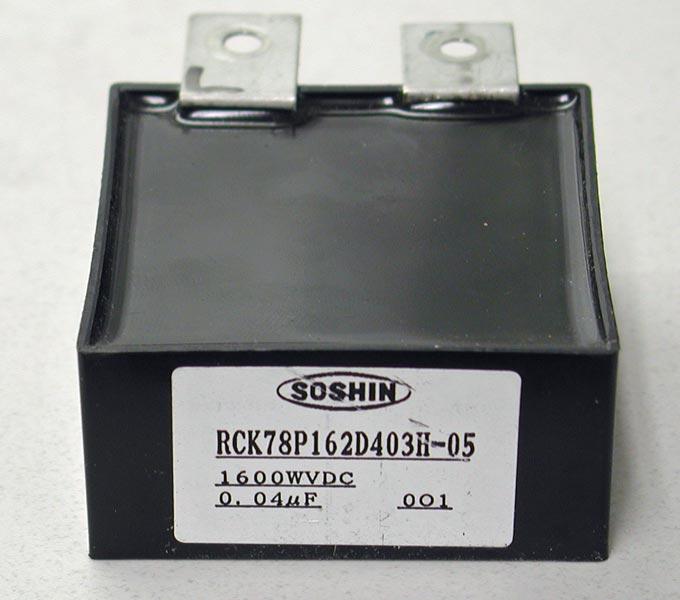
This is the factory cap for 2002 cars (with
flat tabs and ending in -05)
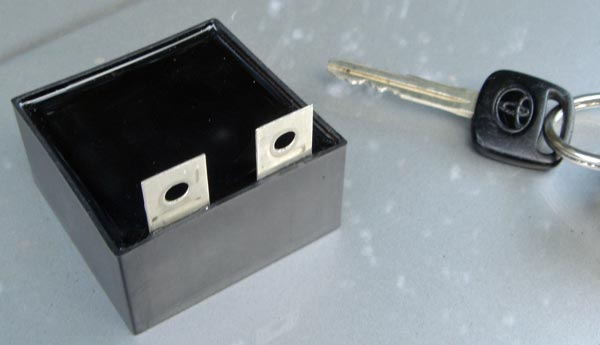
This is for the 2003 (with the far more perky tabs and ending in -06).

The new capacitor is of a slightly different size than the original. Mostly smaller, but also "taller" when installed. Old and new pictured here with my assistant.

Note that the same replacement cap can be used for either car except for the tab situation. Michael has units for both 2002 and 2003 cars with the proper tab orientation. The tabs on the new caps should not be bent as they will fracture. New screws (M4 X 10 mm X .7mm pitch) and washers (four flat washers - two go under each cap tab) should be included with the new capacitor from Michael. Below are the installation steps for a 2002 with Michael's new unit.
1) Park the car in a safe location where you have free access to work under the hood - and good light.
2) You should have the following new parts:
- 1 Replacement capacitor
- 4 flat spacer washers (brass in my kit).
- 2 screws with "wavy" washers
3) You will need the following tools:
- Torx T-30 bit and driver.
- Standard Philips #2 screwdriver with a reasonably long shaft (6" or more).
- A utility knife or other small blade
- Safety glasses
- The new screws and washers shipped with the new capacitor
4) Optional, but helpful tools:
- A "screw starter" to aid in repositioning the Philips screws for reinstallation
- A small flat-blade screwdriver
- Three small plastic bins or cups to hold parts
- Magnetic screw retriever. Just in case.
- An electric screw gun that can accommodate the T-30. This should have an ability to be set for fairly low torque.
- Nitrile gloves. I typically wear these when I work around electrical stuff these days.
5) Prepare the car to be electrically safe.
6) If the top of the "silver suitcase" is excessively dirty, brush it off or clean it with a damp rag. Be sure it's dry before proceeding. The goal here is to keep the *inside* of the suitcase clean.
7) Using the Torx bit, remove the screws that secure the top of the silver suitcase. Put these into one of the bins and set aside. After screws were removed as shown below, safety glasses went on. (should do that before beginning work!)
8) Carefully remove the cover from the silver suitcase. The lid seals to the body of the case with an O-ring seal, so it may be stuck in position. A small flat-head screwdriver or the blade of a knife may be a help in getting into the seam and lifting the cover, but be careful not to nick the O-ring that seals the lid. Set the cover aside.
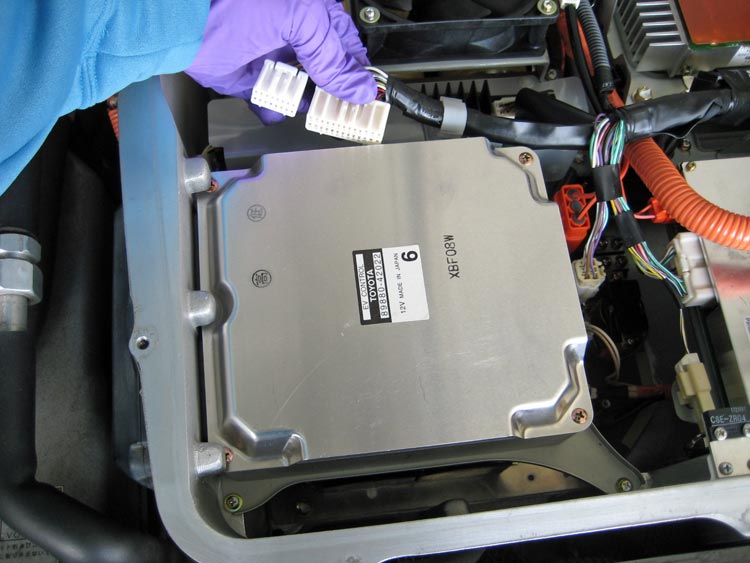
9) Locate the silver box in the front, passenger's side corner of the silver suitcase. Notice that there is a wiring harness visibly connected to this module on the back side of the silver box. There are two white connectors on the wiring harness, with tabs that lock them in place.
10) Depress the tabs on these connectors, and work them free. There is also a cable clip that holds the cable in position. This plastic clip wraps around the cable and then snaps. Gentle pressure on the tab will release the belt, and then you can swing this harness clear of the silver box. Below I show the two white connectors while the harness is still captured in the clip.
11) With the harness disconnected, now remove the four screws that secure the silver box in position. Do not unscrew the upper four screws that hold the silver lid on, but the lower four screws that hold the bracket to the inside bosses of the suitcase. Be careful not to drop these down into the suitcase, as they may be difficult to retrieve. Place these into one of the bins, and set aside for reinstallation.
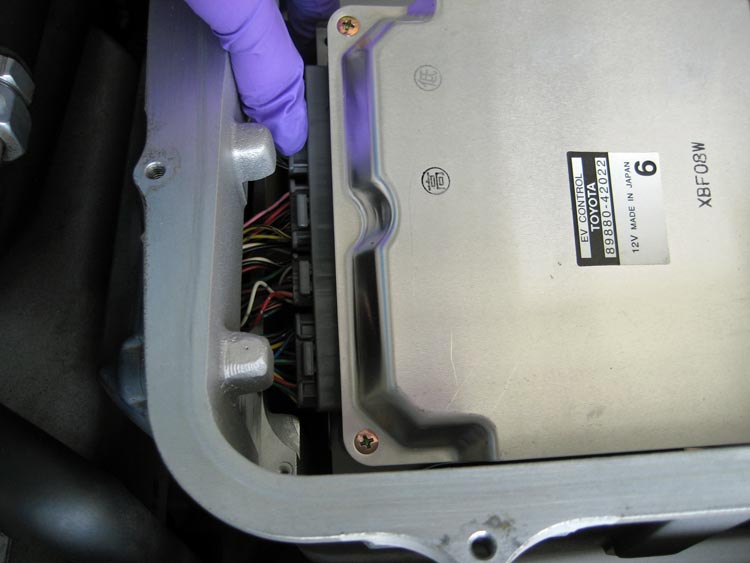
12) Gently pull the silver box toward the driver's side of the car. This reveals another set of connectors on the passenger's side of the module. These gray connections go through the side of the silver suitcase, and are covered by a rubber boot. There is not a lot of slack in these connections, but there should be enough to pull the module out by an inch or two, revealing where the connectors plug into the silver box. These connectors also lock into place. Press the tab in the center of each connector to allow it to be unplugged. I had to use a flat-bladed screwdriver here to get them started out. Don't force anything! (this and the replacement of these connectors is the most difficult part of the process. Just be patient). I have my finger on one of the lock tabs in the picture.
13) With all connectors disconnected, gently lift the silver box out and set it aside somewhere safe.
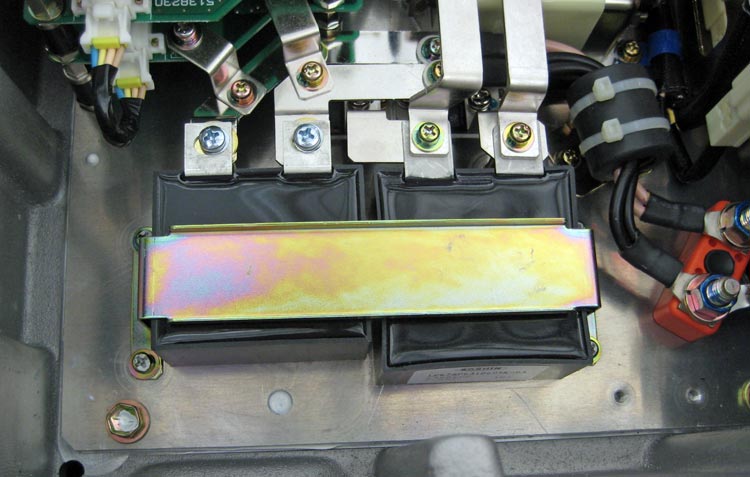
14) You should now be able to see the rectifier assembly, which was under the silver box. Toward the front of the car, on the passenger's side, there are two large, square black plastic components held in place with a metal clamp bracket. The one closest to the passenger's side is the capacitor that needs to be replaced. This one.
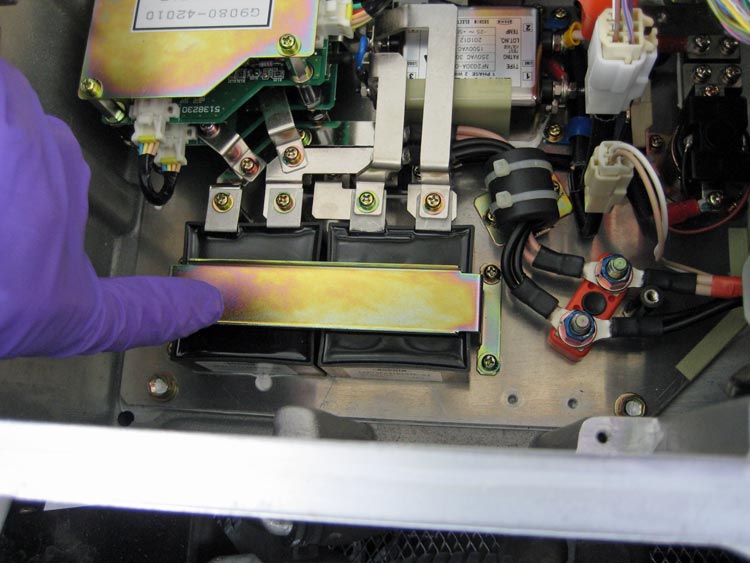
15) Remove the four screws that hold this clamp in place. Place into one of the bins and set aside.
16) The clamp may be stuck slightly in position, but gentle hand pressure should pop it loose. Remove the clamp and turn it over.
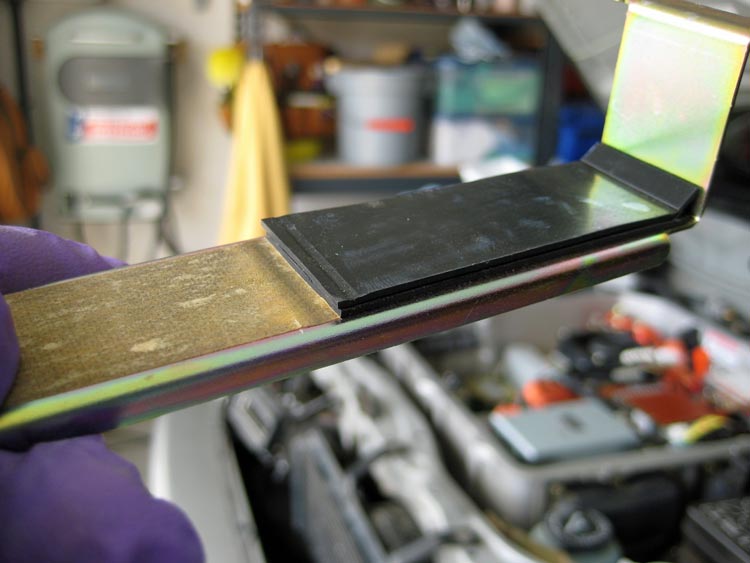
17) On the underside of the clamp, you should be able to see a rubber strip that was pressed against the top of the capacitors. It will probably have indentations showing where it was pressed against the capacitors. Because the replacement capacitor is slightly thicker than the original, you need to trim off the part of this strip that will go over the new capacitor. Use a utility knife to cut the rubber strip in half and then peel off the part that used to go over the failed capacitor (left half). Install this removed half of the strip on top of the right half so there is a double layer of rubber over the right-hand cap. Strap shown below with two layers of rubber on one side, nothing on the other. If the adhesive is shot, use some double-stick tape or some othery way to make the rubber tacky enough to stay in place long enough for reassembly.
18) You can see that the capacitor is connected with two screw terminals. Remove these two screws and their washers. Because we will be using different screws to attach the new capacitor, you may discard these original screws and washers, or save them as a souvenir.
19) The failed capacitor should now be free to lift out. You may save it as a souvenir if you want.
20) As noted above, the new capacitor is slightly thicker than the one it replaces.To prevent the tabs from being excessively bent when screwed back into place, we will use spacer washers under the tabs of the capacitor (all screws and washers needed will come with the cap from Michael). Place two spacer washers on top of each threaded mount where the capacitor tabs were located.
![]()
21) Being careful not to knock the spacer washers out of place, put the new capacitor into position.
22) Thread the new screws with the "wavy" washers (both items that should come with the new capacitor) through the tabs on the capacitor and through the spacer washers, and tighten them into place. Snugly hand-tight is all that is required here.
23) Place the clamp bracket back into position, ensuring that the side where the rubber was removed goes over the new capacitor. Even with the rubber removed, the bracket may end up flexed slightly when tightened over the new, thicker capacitor, but that's okay. Replace the four screws that held this bracket into position. A screw starter is a big help here. Start one screw on the side of the bracket towards the center of the car first, then one diagonally across towards the passenger's side. Leave the screws loose until all four are started, then tighten all four screws. Snugly hand-tight is all that is required. Picture shows new cap and strap back in position and screwed down.
24) Bring the silver box back into position so that you can re-insert the passenger's side connectors. Press each connector in until it clicks into place. This is about the only difficult part of the project. I found it easier to reach one hand under the silver box and keep one hand over it so I could push the connectors equally from the top and bottom.
25) With the connectors mated, slide the module back into position above its mounting holes, and replace the screws that held this module into position. The mounting hole that is closest to the center of the silver suitcase is on a slightly flexible post or bracket that may need to be gently moved into position. Start this screw first, then maneuver the module into the proper position to align and start the other three screws. Once again, snug each screw hand tight.
26) It's time to replace the wiring harness on the side of the silver box towards the rear of the car. First put the harness back into the cable clip. Bring the clip around the cable like a belt, and as you squeeze it into place you should hear it click. Now reconnect the two plugs to the module. They will click into place.
27) Double-check that everything is in position, and there are no loose items, tools or debris inside the silver suitcase!
28) Replace the lid of the silver suitcase. Start all of the Torx screws by hand to avoid cross-threading, then snug by hand. Official torque spec is: 53 in-lb or 6 n-M.
29) Reconnect negative battery terminal (this is the step I forgot!), and replace the Service Prug (...and cover plate and carpet flap. Cheerio crumbs need not be replaced).
30) Cross fingers and Insert charge paddle.
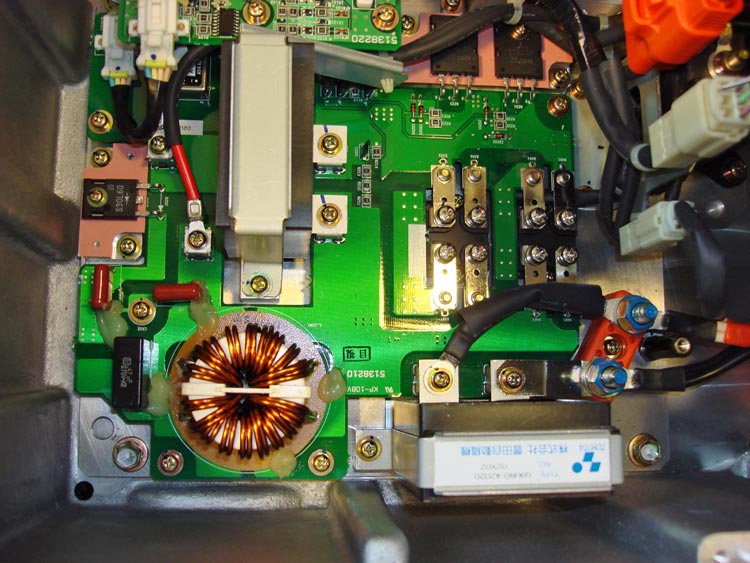
2003 - below is the inside of the 2003 suitcase. The Cap that needs to be replaced is in the lower right of the picture. A bit of extra rubber will need to be added to the hold-down clamp since the unit is smaller than stock.
Click for |