
Curt Hitch 1-1/4"
** Note: Since my melting problem shown here, this hitch has been redesigned with my input to fix the problem for all future customers (new design shown here). Any new hitch shipped since 2007 will be the new design. **
The old version of the hitch that I've shown in my images can no longer be purchased. The latest model is right here:
Curt 1-1/4" receiver hitch. This unit has a great powder-coat finish that impressed me. Of all the hitches I've owned, this was the first one that didn't look like it NEEDED to be hidden under the car. The installation took very little time - the hardest part is cutting the plastic under-body pan to fit the larger flanges of the hitch. I also had to bang the flanges into position, as they arrived bent slightly inward enough so that the bolt holes would no line up with the captive nuts.
Cute story here, regarding my 5-year-old daughter Kyra:
The trailer hitch arrived for the Prius, and one flange was a bit bent from shipping….so I took it over to the tree in the front yard to bang it straight (this is actually part of the instructions! - and it worked REALLY well)... but anyway –
Kyra: Daddy, what are you doing?
Me: I’m trying to straighten this thing.
Kyra: Are you going to straighten the tree in the back yard too?
OK, so the basic plan is that you remove the plastic under-body pan, trim it to fit, unbolt the tow eyes, and bolt the hitch up to the captive nuts that held the tow eyes. One issue that surprised me was the the longer replacement bolts supplied with the kit would NOT work in the front position. The bolts are long, and would bottom out before clamping the flange. I ended up recycling the tow eye bolt for the front position, and using the new bolt in the rear position on both sides. Specified torque is 35 ft-pounds. But bolts holding the tow eyes on are torqued FAR beyond that though! You'll need a breaking bar!
When you are all done with this, you can add trailer wiring in plug 'n' play form.
Here's where we start. I left the car on the ground for the entire install.
No need for ramps even.
That's the long bolts that won't fit in the front position.

The plastic tray with elongated slot. I used a combination of sheet-metal
shears and utility knife to cut it. That tray is held on with FOUR different
types of fasteners. Crazy.

Close-up of the slot in the tray with the installed flange poking through
it.

The two different bolts I used. On the right (toward front of car) is the
original tow-hook bolt. On left is the bolt supplied with the hitch kit.

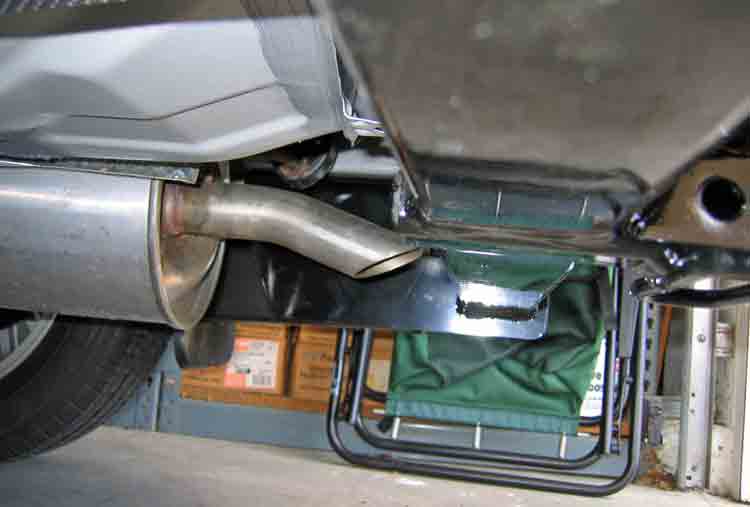
Installed, showing clearance to tail pipe. The exhaust tip will be blown
onto the edge of the crossbar. (See the result of
the exhaust blowing on that cross-member!). Directly over your head is the
cross member in this shot. You're looking down the length of it. Receiver,
safety-chain loops and lock pin hole can be seen on the right edge.
I added this picture because after seeing the last one, I realized I should
*really* polish my exhaust. So I did. This does show that nothing gets anywhere
hear the exhaust though - unlike other Prius hitch offerings which require
the exhaust to be lifted with a hose clamp to gain clearance from the cross-member.

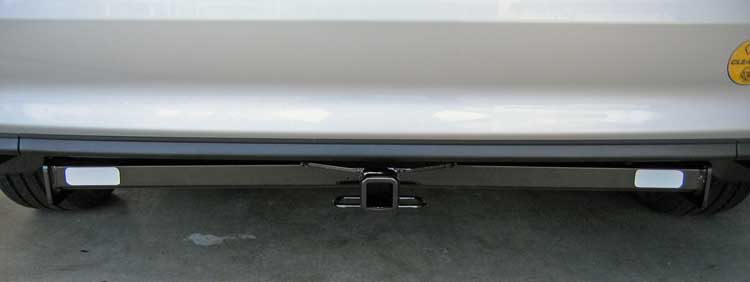
Showing the tight clearance. And if you look on the far wall, you can see
my EV charger as a bonus.

Looks like a lot of room in this close-up. I can't even fit my finger in
there. It is nicely tight up to the bottom lip of the bumper.

Some views from the rear. There's really nothing to bang your ankle on here,
which is REALLY nice (he says from experience).
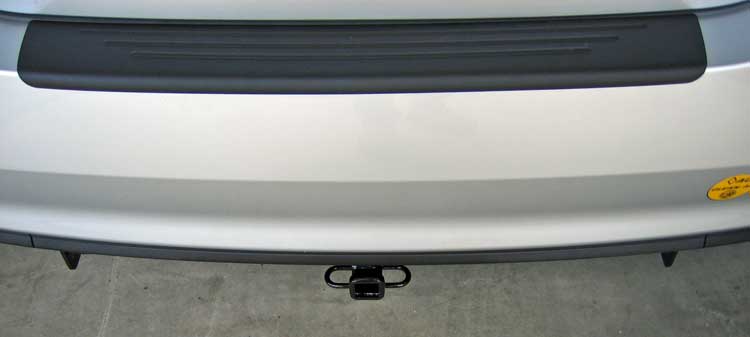
I added reflective tape. I'll probably take it back off though. Without the
tape, the hitch just disappears under the car.
From ground-level.

From the driver's seat of the car behind you at a stop light.

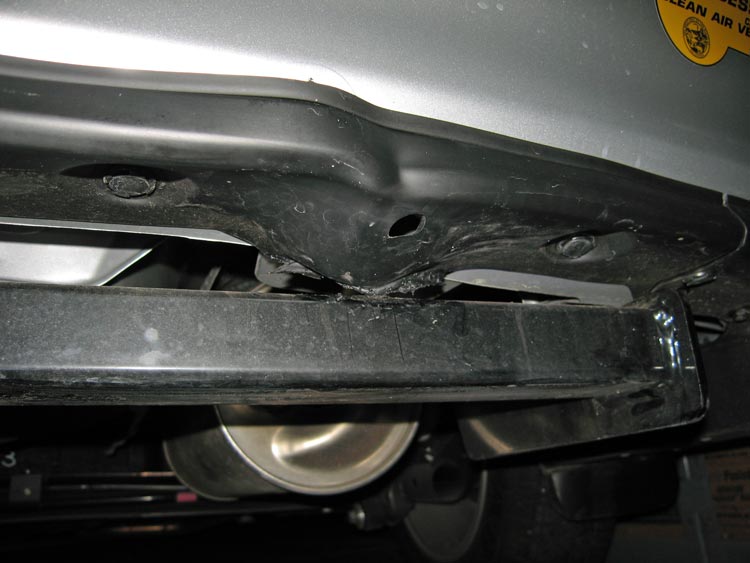
And now for the bad news... the original-design hitch caused the hot exhaust to be directed up to the rear spoiler. The spoiler has been destroyed as shown below.
New rear "spoiler" is $117.23 from your local Toyota dealer. PN: 76891-47010. This assumes you can still use the clips from the old one. Not only is my spoiler damaged - the lower lip of the painted bumper is damaged as well. Some of the paint has melted and moved to form a crease (it doesn't show well in the first picture, but you can barely make it out just above and to the left of the big crease in the spoiler part shown below. Easier to see in other shots.

Here you can see the paint damage better. Looks like an arched eyebrow above
and to the left of the crease in the spoiler. No way I'm going to pay for
a new bumper and paint though. I've already paid more for repairing this problem
than I paid for the hitch in the first place.

The temporary fix to get hoe from my trip without adding more damage.

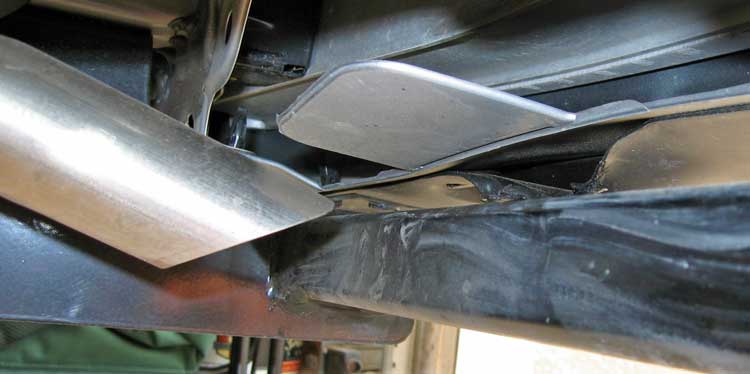
Permanent fix. I had some tube bent, and I welded it up to the back of the muffler.

After three months of conversations with Curt, and repayment for my hard
expenses (though nothing for my labor), Curt finally admitted they had a problem,
and redesigned their hitch. Shown below is the new hitch design on another Prius. Instead of the the square-section cross bar going
all the way to the passenger side behind the exhaust tip, a flat bar has been
welded to the top so that there is no more interference. It was a frustrating experience to be told that there was NOTHING wrong with their product, only to find that they eventually redesigned the hitch using my suggestions. How many times can a guy hear, "you're the only one complaining" before he explodes?

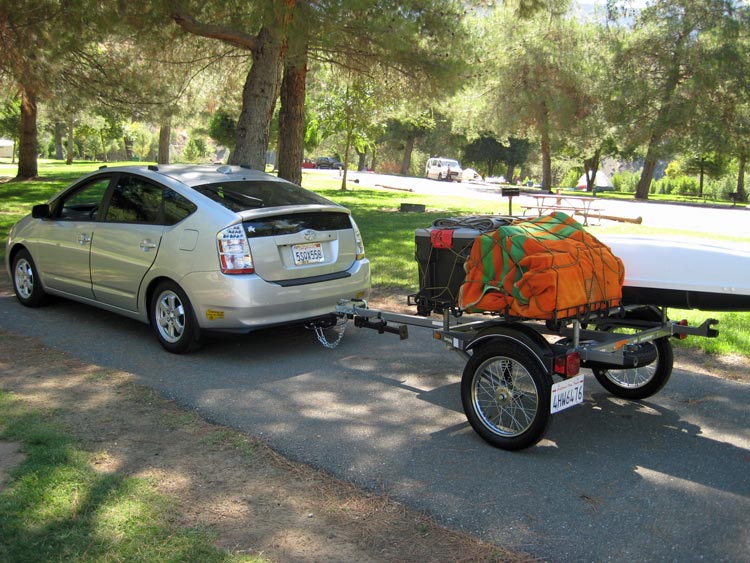
So now that we have the hitch issue fixed... what can the hitch be used for?!
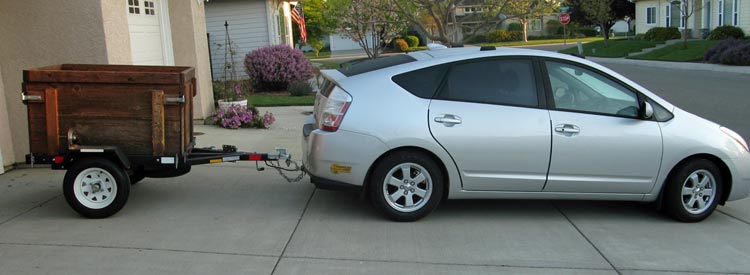
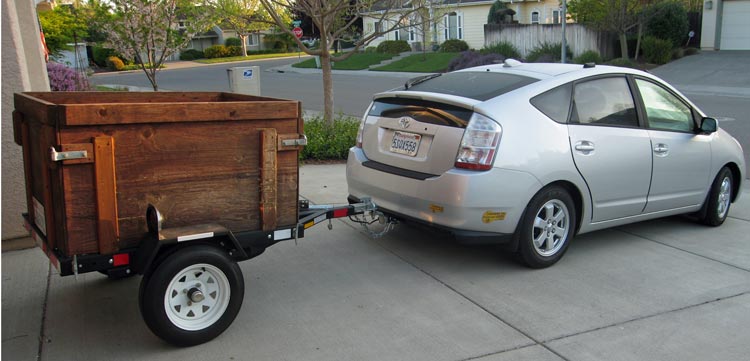
Well... hauling your home-built utility trailer.
Or how about the new SportsRig?
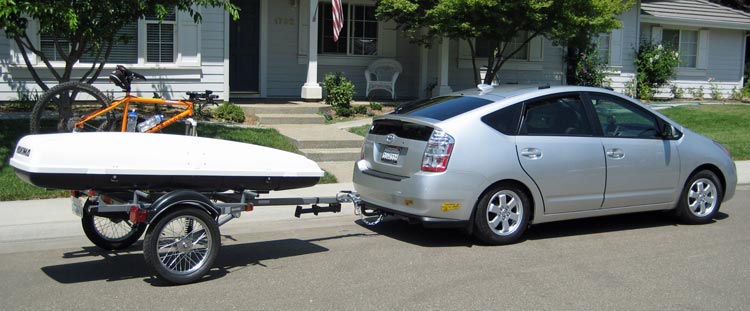
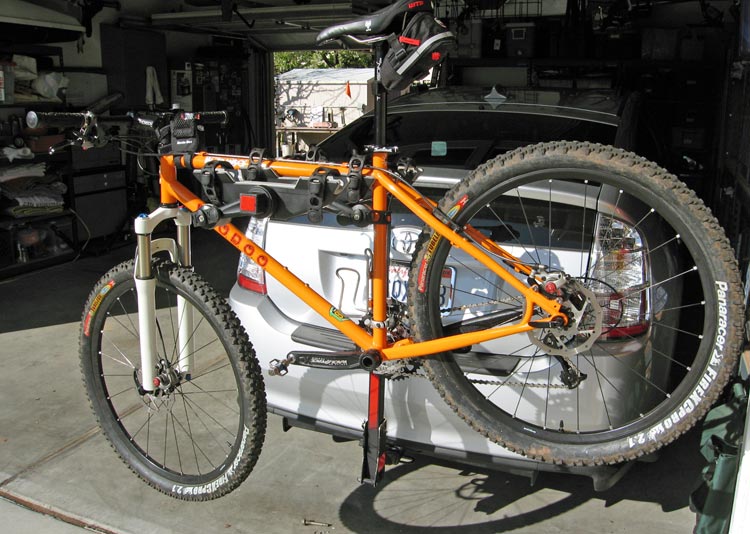
Hauling bicycles on a top-tube rack.

Click for |