Thanks to the great research of Jim Hannigan, I was able to save my charger from meltdown. One evening I walked out to the garage during charging, and discovered a familiar "burning electronics smell" - or the smell of "magic smoke" as I like to call it. It turns out that the two rectifiers are installed into the main board of the charger via clips that are not up to the task. These rectifiers carry the full charging current, and in a perfect world, they would be bolted to the board. In my charger's case, three of the eight connectors went high current and began to heat up and deteriorate. First indication of a problem is the melted white foam surrounds, which hide the discoloration. Once the foam was pulled back, it was clear that the connectors had overheated, causing dark brown areas in the circuit board. Using an 800° tip on my Metcal soldering station, I permanently soldered all eight connectors to the rectifier legs. Problem solved!
According to Jim, all but a few of the 30+ Gen2 and Gen2+ units he has inspected have shown some amount of heat damage at these rectifiers. This is a design flaw for certain. That so many of these chargers continue to function without issue is somewhat of a surprise. For lightly-used chargers this may never become an issue. But for a charger that is used every day (like ours!) it is obvious that this type of connection is just not up to the task.
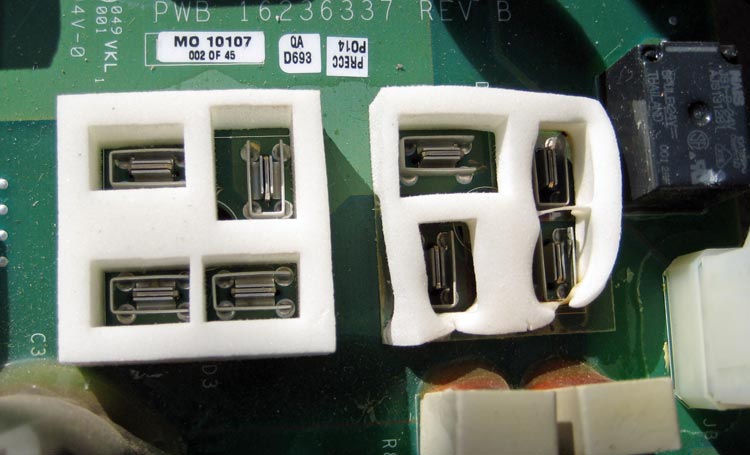
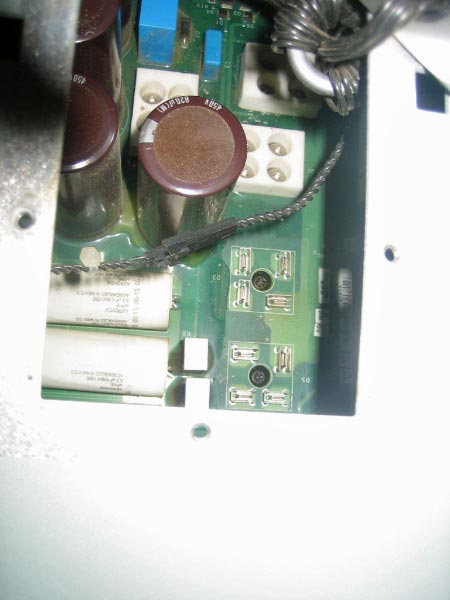
Here is the first visual indication of the problem. The visible side of the board only shows the legs of the rectifiers and their clips (the rectifiers themselves hang down below the board and sit on a heat sink. The legs protrude up through the board and into these clips). The foam surround on the left is perfectly intact. The one on the right has begun to melt. I missed this on my first inspection - mostly because nothing was black like I had expected. Just less white in this case!
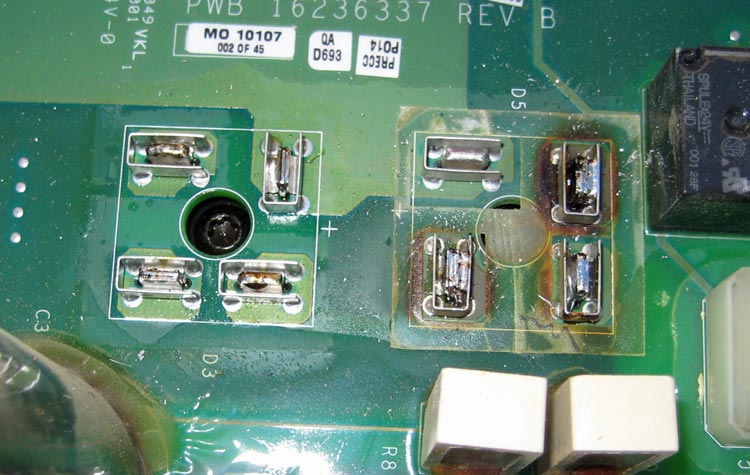
With the foam removed, you can see the burn marks. One quite bad, two just starting to get bad. The rest are just fine. This picture shows all the connections after they have been soldered.
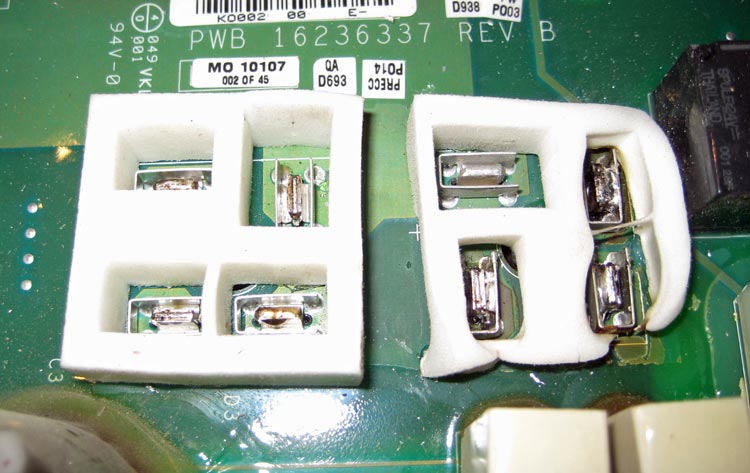
And here I have it all back together. Clips are soldered, and I glued the original foam back into place as best I could.
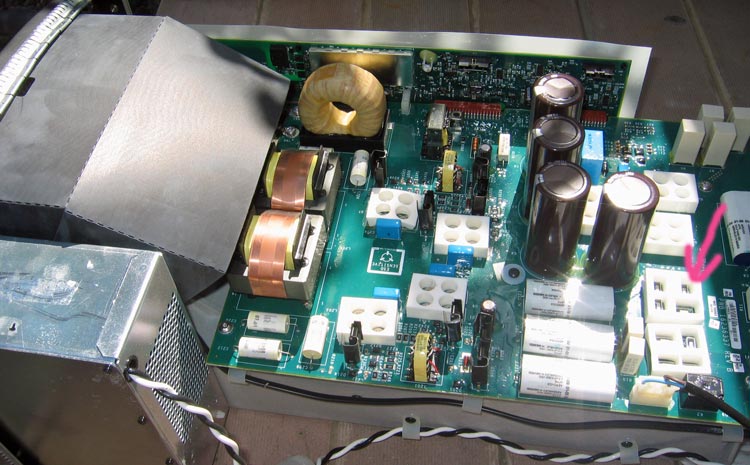
The location of these clips is shown by the pink arrow here. This area can be inspected with minimal disassembly by removing the two Torx screws that hold the display/holster to the face of the charger (see below). Once the display assembly is moved out of the way, these clips can be seen easily. The chances are, you WILL see signs of heat damage. Then it is up to you to decide if it needs fixing now.... or later. From what I know now, it appears that ALL of these chargers will eventually fail here.
Checking these rectifier connections without removing the case.
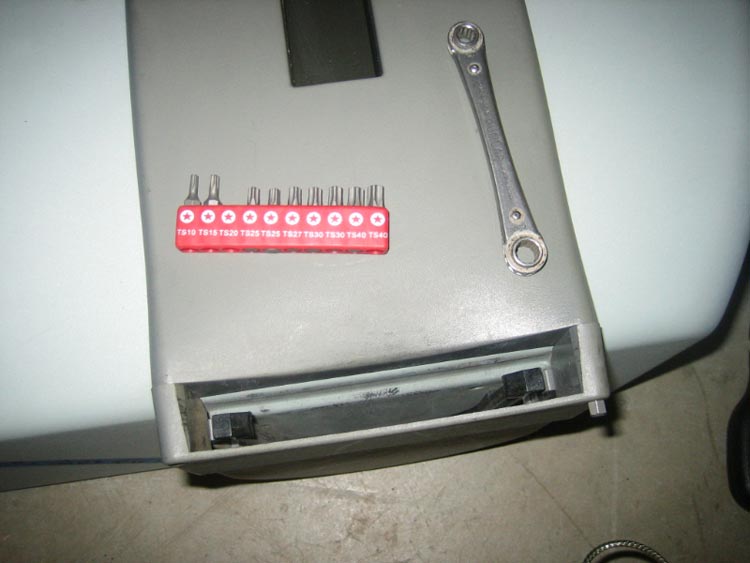
Tools needed:
Now, with the help of some images and info provided by Tom Dowling, I can show the process of inspecting these connectors without removing the case. First, get yourself a set of 5-point Torx security bits. You'll need TS20 for this project. Note in this image that the bit is inserted into one of the recessed holes. Not much of the bit sticks out (GM made a special tool for this), so you'll have to be a bit (pun intended!) creative in applying enough pressure to keep the the thing seated in the screw (especially important when reinstalling later). One idea is to push on the end of the bit (through the wrench) with a small screwdriver.
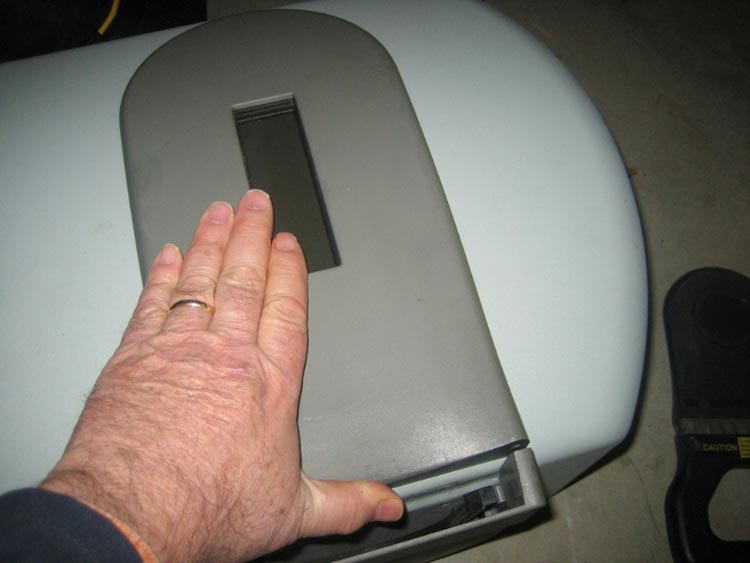
The two screws will want to stay in their holes once loosened. When you're sure they're as loose as they can get, push the display away from the holster as Tom's lovely hand demonstrates here.
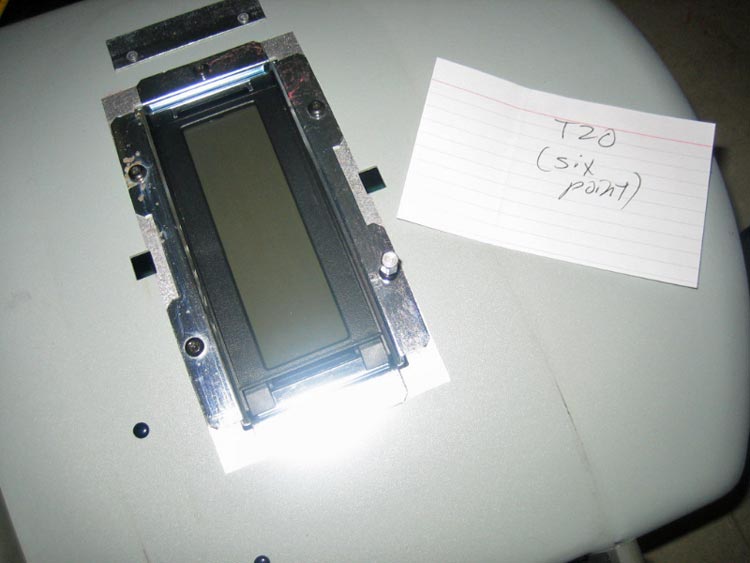
With that trim plate removed, you'll grab your handy six-point Torx set, and choose TH20 to remove this bezel (bit in place in one of the screws). Of course these screws can be removed with the Dremel-slot trick (cut a slot with a cut-off wheel, and just use a flat-bladed screwdriver) if you desire.
Presto. Display can now be moved out of the way - leaving a hole big enough to pull out any squirrels that may have been living in there.
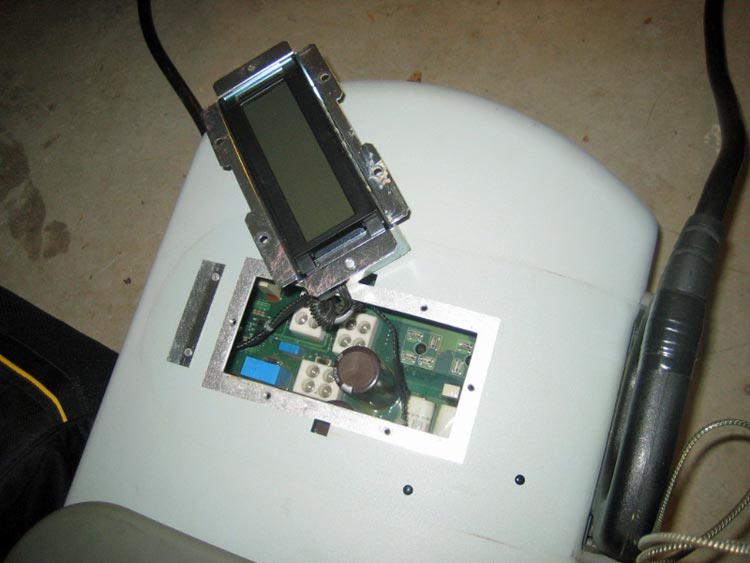
And when you look closer, you can see the rectifier connectors easily. This is apparently one of those rare Gen2+ units that has not started to cook the clips. Notice that there is no foam around these, as there was on my smoking unit above.
Click for |